Search This Blog

Saturday, 22 October 2011

1967 VW Split Screen Bus Trimmed For A Wedding Bus.......................

Hello to you all,
I have been so busy trimming I've not had anytime to update the blog....anyway here is an update for you which include some beautiful buses for you to see .Below is a gorgeous vw split screen bus trimmed out for wedding hire......And WOW the customer wanted and WOW they got......After three weeks solid work and gallons of tea and biscuits the end result......I hope you like and if you have any questions please contact me on : incavilla@aol.com or tel : 07794978914..... Enjoy.......................


This is a 1967 bus in all her glory......gorgeous colour and her name is BERNIE............................


This is a photo showing the old seating frames, these frames were cut down and reused for the buddy seats.


Front cab area before the strip down started, the front seats were in very good order but these were replaced to match the rest of the bus.


A full width rock and roll bed was fitted, for the times when the new bride and groom cannot wait.....loll.

Again the old door cards were in good order but not fitting in with the new style.
Note:- All the new door cards no screws and cups were used.....This gives such a clean line and finish.


A different picture showing the new rock and roll bed. You can see the new foam fitted to the base boards and the workings out of the new covers, this helps when cutting to get it right first time.


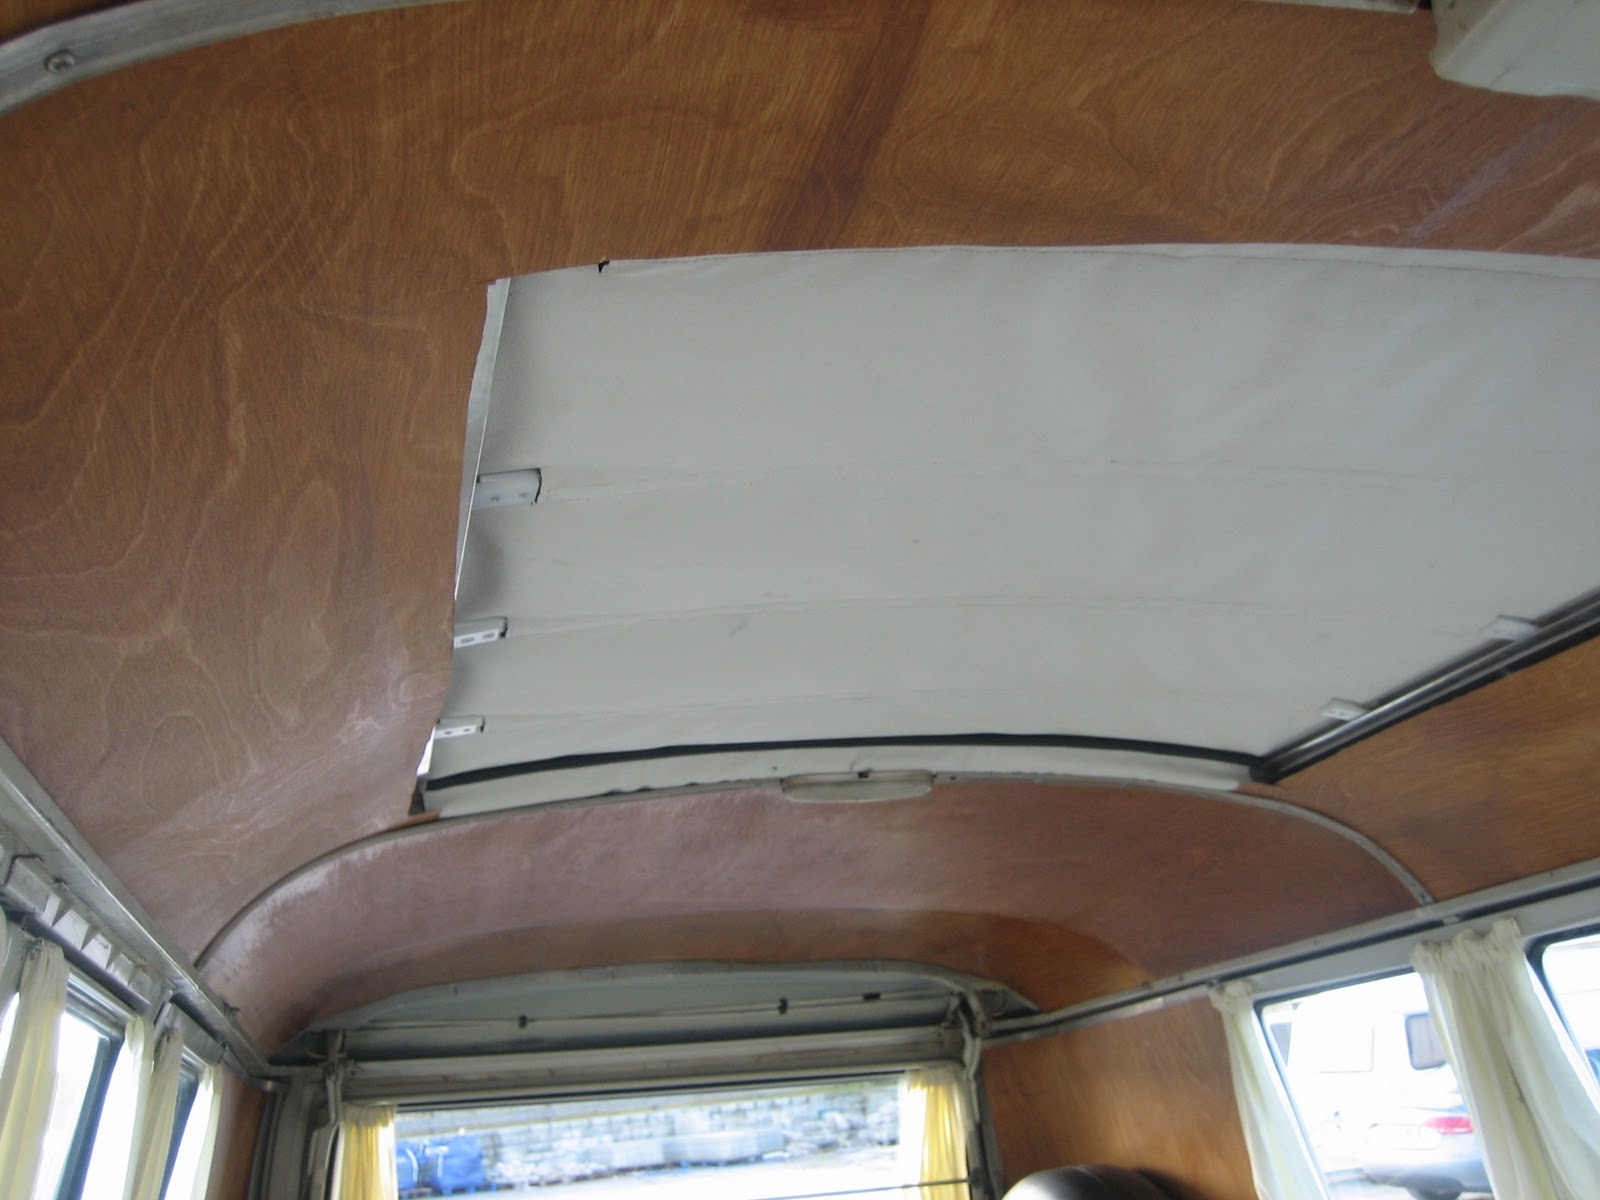
Here you can see the ply head liner, This was re used but it was covered in cream head lining cloth to match in with the plush wedding look .This bus had a small rag top which was in very good order and just a clean and was as good as new.


A striped down and ready to go.......well it was 2 in the morning so off to bed for a early start.....


The rear area being mocked up with the two buddy seat units having the frame work made and the rock and roll bed unit now all fitted with some old cushions in place to see how it would look.... a long way to go....


Front seats striped down and all the old covers removed. All the frame work was cleaned checked and then painted ready for the new seat and back pads to be fitted.


For a bus this old the springs were so good order, its hard to believe they are over 30 years old.


Here you can see some donor covers I used to template the design that the customer wanted. You can see the inner and outer style being worked out....... measure measure measure and in the end...............success.


Template cut out, ready to be cut out of the leather, as you will know if you've ever bought leather it is a costly product, so moving the parts around to find the best  fit so as not to waste the leather.


A little step forward.....this is the suede fabric used for the centre panels of the seats and door cards.
This was the wow factor that complemented the leather so well. This was being foam backed ready for the stitching work to be done.


Here you see a panel marked out of leather, as you see leather is tricky to cut as it comes with natural marks called SCARS.....all this needs to be taken into account, before making the cuts


This is the reverse side of the centre panels The customer wanted diamond stitching style,  You can see some adjustments were needed to get the sizes right, Once this was sorted all the other panels were much easier.


The marking out of the backing shows just how much work goes into even the smallest of parts..........


A picture showing the outer boarder marked and ready to be transferred to the leather. You can see the sewing guide marks, This is very important as if they do not line up when sewing you will end up with a out of shape seat......


This is the finished centre panel ready to go into the leather outer section.....Tea time.............


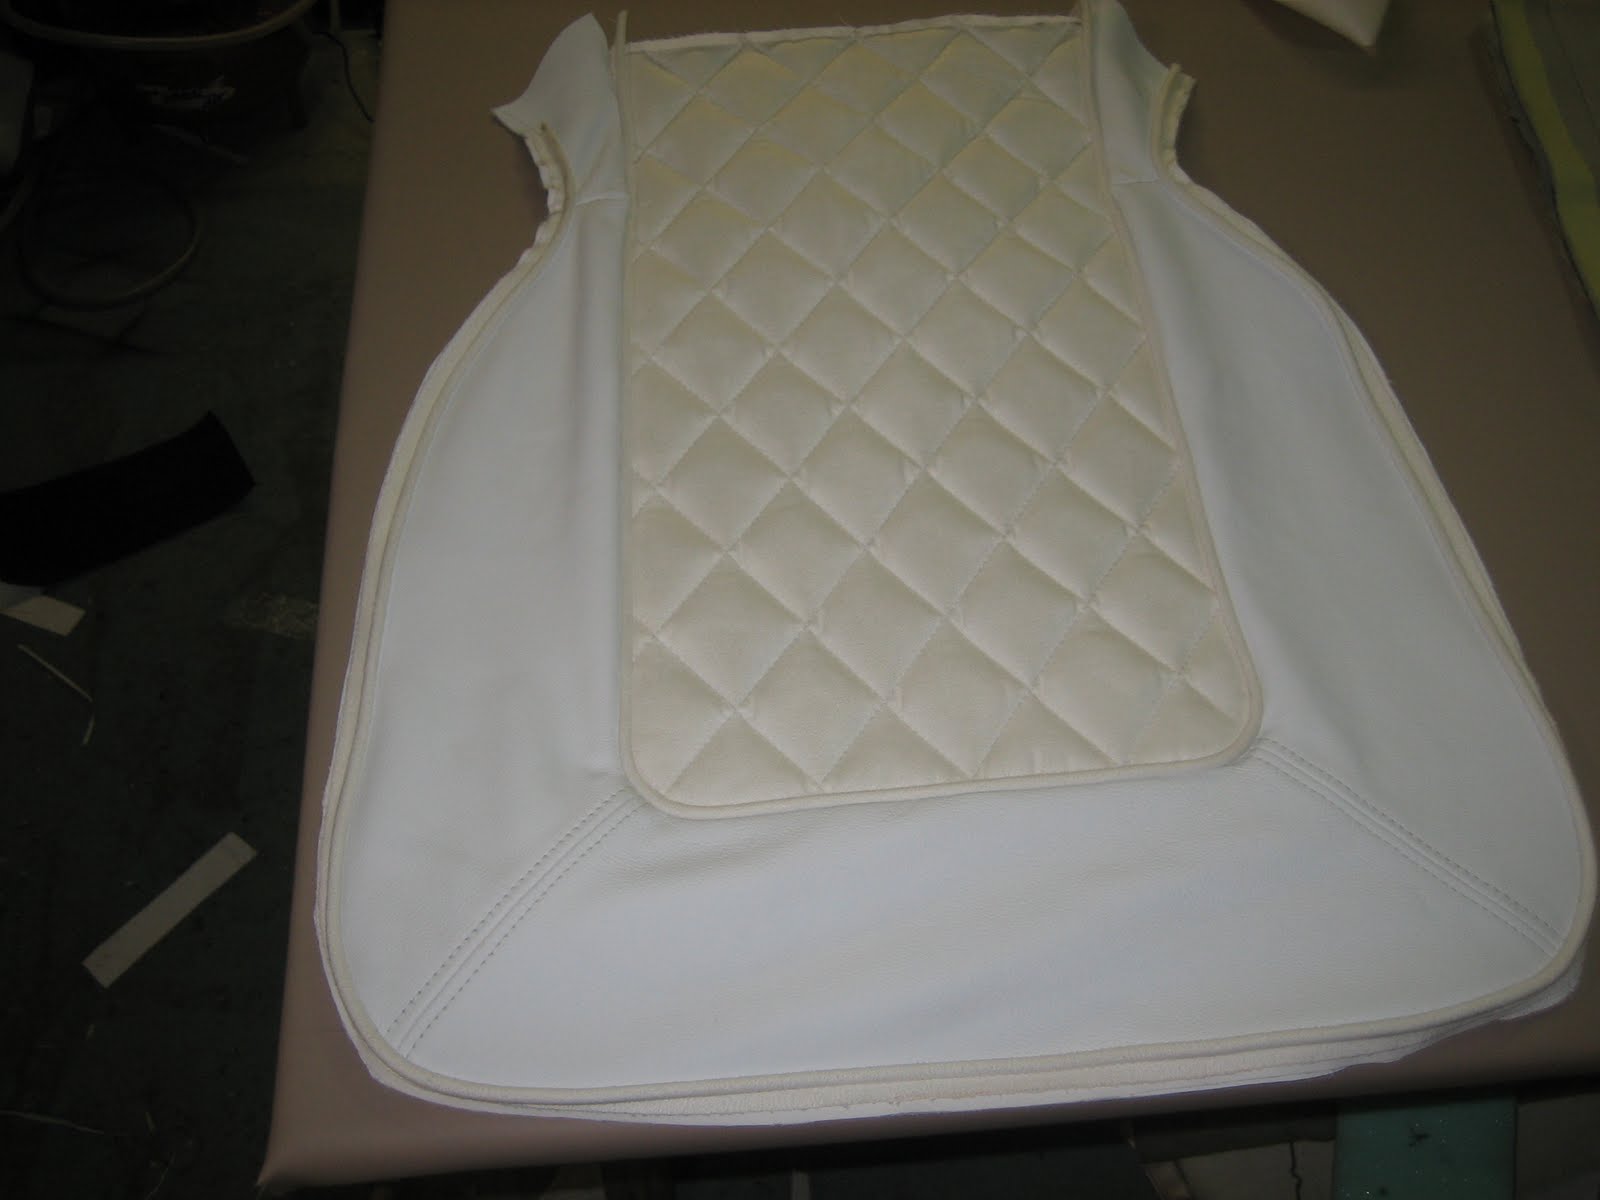
The centre and the outer panels put together before the stitching was done just to make sure all lined up......


As if by magic........All sewn with piping added to create the sharp clean finish.


Well this looks like just a pile of material............Well its taken over 5 hours to get this seat to this stage, The covering is being placed over the seat swab and foam  to make sure all fits. Note the wire showing this allows the cover to be pulled tight and making the clean finish.


This shows the seat ready for the cover to be fitted, you see the outer foam which is shaped to fit and creates the style the customer was looking for.


All on.....with double stitching seams for strength and it also finishes the look ........I LIKE.....cool


A different angle of the seat in the bus.... finished you can see the suede centre with the outer in leather with suede piping.

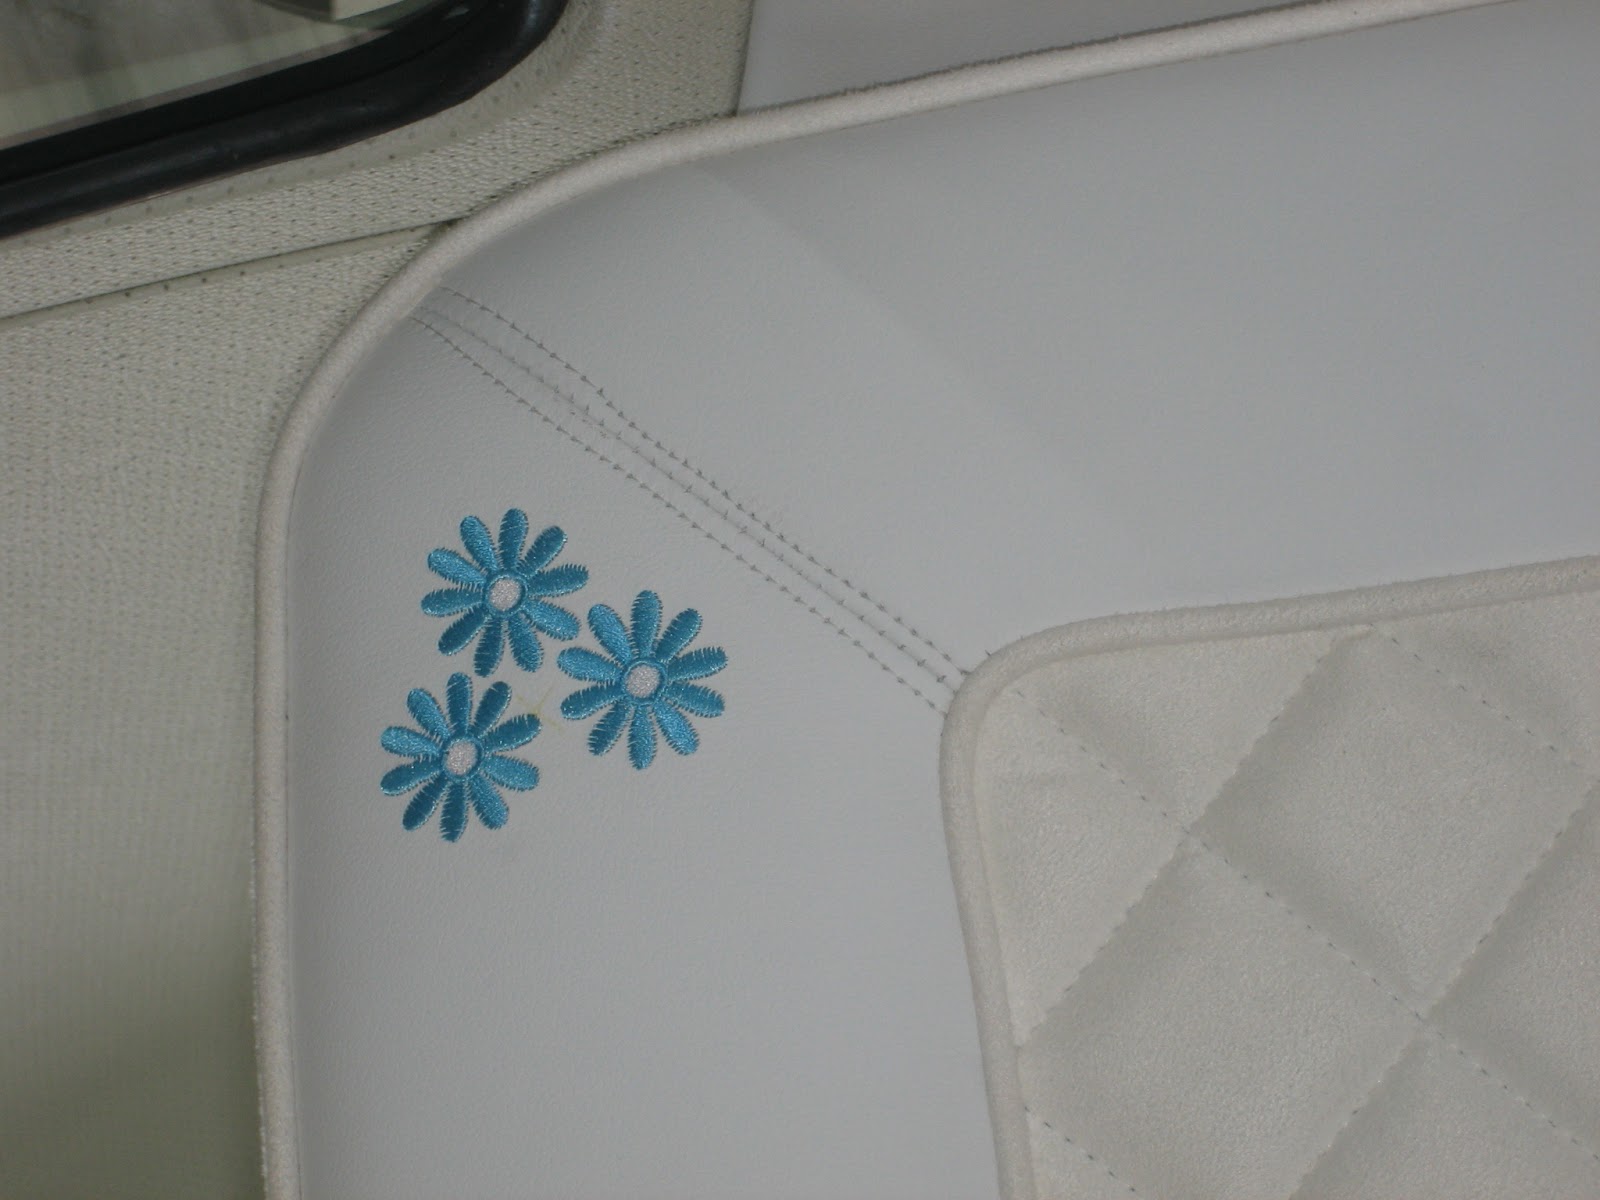

The back was much the same process but with the added touch of having 3 flowers embroidered into the back panel I   think a nice touch....
 

The finished item..............I loved the look and the effect i was looking for......10 hours of work on this seat alone but well worth every minute spent I think...let me know if you like, on my comment box


The rock and roll seat being fitted to the base board. Note the white wadding used.... this allows for the extra softness to the finished look.


All done... you can see the full width rock and roll bed in all its glory, with the detailed stitching / diamond style with the matching flower as the front seats...looking nice....


Here you can see the flower design in more detail... working out the style and colour which matches the outer colour of the bus makes the finishing touches.


This is the re used ply head liner  lined with new white lining cloth then re fitted with new aluminium fitting strips.....makes such a great finish.


As you can see this is the large rear cushion that makes up the rock and roll bed... We have put the name BERNIE in the centre .I think this looks great... A few more adjustments to the cushion and its ready to fit to the bus.


Even closer look at the name.....a great touch we can do to any ones bus or beetle.... just ask me for a quote and i be happy to help.


Above you can see a selection of pictures of the door cards trimmed in the same style and fitted to the bus.... it was important to get the scaling right for these to match the seating.....and note there are no fixing screws showing on this panels as some buses show, I use my special fixing way.... this helps keep that clean look to the whole job.


The front seats in all there glory..... with all the finished parts fitted around them......She looks great....


This shows the two rear facing buddy seats that were completely custom mad to fit the bus..... they were trimmed in the same style with lift of seats for storage.


Open wide........ All that's missing is the bride and groom.....wow what a job.... i hope you all like the pictures it was a lovely bus to work on.....


There you go ..... all done keep a look out for the next project Any job undertaken from the full on re trim as above to the small stitch repair . I you have any questions you can contact me on mail:-  incavilla@aol.com
or tel : 07794978914

Cheers Colin


Wednesday, 24 August 2011

VW Split Screen Front Bench Seat Re Upholstered


Hello again, here is   this weeks challenge.. we have a front bench seat to a early split screen camper van. This seat had 3 layers of covers along with some horrible bugs that we had to spray to kill them off......had quite a few bites to prove.Well here we go the customer decided on some woven material center panels with vinyl outer with contrast piping .


With the first layer of marital over covers removed we were getting near the originals.


The seat turned over and all the springs were in very good condition and was reusable.


With all the old covers and padding removed i cleaned the frames and painted, then fitted all new padding's.


This is the seat with new hessian canvas fitted before the new padding was fitted.


Here is all the new cover cut out and ready to be sewn...............


With the different sections clipped together ready for sewing.


The top section all sewn and the contrast piping fixed and ready for the next stage


All finished , now all that's needed is for the cover to be fitted to the frames .


A close up photo showing the double square stitched pattern.


Here you can see two pictures of the completed seat and back, I love the clean tight look of the covers and the colour works great.


 And finally the finished seat, many hours of hard work and a few  cups of tea......cant wait to see the customer and the seat fitted into the bus...................If you need any info on any upholstery work please feel free to contact me on : 07794978914

Thanks
Colin


Tuesday, 23 August 2011

Horse box lorry seats

                                                   
                                               Just finisjed two lorry seats for halo horse boxes... Cool
                                                         --- Sent with Mobile Mail by Orange

Sunday, 19 June 2011

VW T4 Camper Van Upholstery

 Well hello to you all again...........I seam to be having a run of T4 vans.....loll.  But i do like these vans, they offer modern driving with a cool surf bus/ day van look.Bellow is a re trim i did for a couple who were over the moon with the end result. This transformed the whole look of the van from standard to a stand out from the crowd look. ENJOY.


                           Ready for the strip down......front seats and rear rock and roll bed unit.


 The seats were in great shape , so just a strip down and a clean of the runners ans a layer of over foam to the seat bolsters was all that was needed.


                            The inside of the van with the front seats removed ans a cool surf board table......


 Hear are all the seat components cut out and ready for sewing....you can see the piping cut and ready to be sew up first...a long process but the end result is worth the work.


 These are the rear rock and roll covers ready to be sewn, you can see the lone side boarders ready to all be sewn together.


 The foams cut and have been marked showing the process of working out the alignment of the materials and proportions before the sewing is done. Time is always taken at this stage as a mistake hear can mean starting all over again.


 The sewing process shown, I had to stop for a cuppa as this was late into the night as i had to meet a deadline for the customer....So tea and biscuits was needed.


 There all done, sorry about the jump in the process of pictures, If you want to see how the covers are put onto the frames please have a look at some of my earlier blog as they show this process.


 Looking good....I love the contrast piping it makes the plain blue of the seats stand out really good.


Here you can see the rock and roll bed all in place and ready for some use...I always look and try the seating out, As looks can be good but you need to make sure that the seating and bed use works....And it was just fine on this bus.


The buddy seat looking cool.....a great little extra seat for using for storage and when Friends pop in for a beer or two.
I hope you all liked and if you have any questions please feel free to contact me.....Cheers for now.
Colin

VW T 4 Van Rock and Roll Seat Upholstery

Hi all here is a short post of a nice 3/4 rock and roll bed that i re trimmed in a very Nice t4 day van......hope you all like.


                           This is the van just been dropped of ready for me to do some magic...........loll


First steps was to cut out the foam, this foam i use is a mattress grade foam which is great for sitting and sleeping on.Making sure the foam fits good then you can go on to the cutting of the covers.


Here you can see layed out the blue and silver material the customer wanted....you can see the process needed making sure that it all lines up.


This is the under lining i use, it is a water proof liner just in case there are any water leaks in the van the foam will not get wet............


A closer look at the strips....i had to cut all the pieces very accurately so  when sewing you get this nice straight look.


And as if by magic...all done.You can now see how important it is to get the stripes lining up.... i think there is nothing worse than it not matching........


A cool look....loll seeing it from this angle give what could be just a plain looking re trim into something very good.


Te strips followed on the out side of the van to.....Cool. i managed to get the strips lining up with the inside.


There you have it...a nice little blog showing what can be done.......Hope you all liked and please leave a comment if you like or if you have any questions please contact me on : 07794978914 ......I'm of to the beach now........Cheers .Colin