Search This Blog

Sunday, 19 September 2010

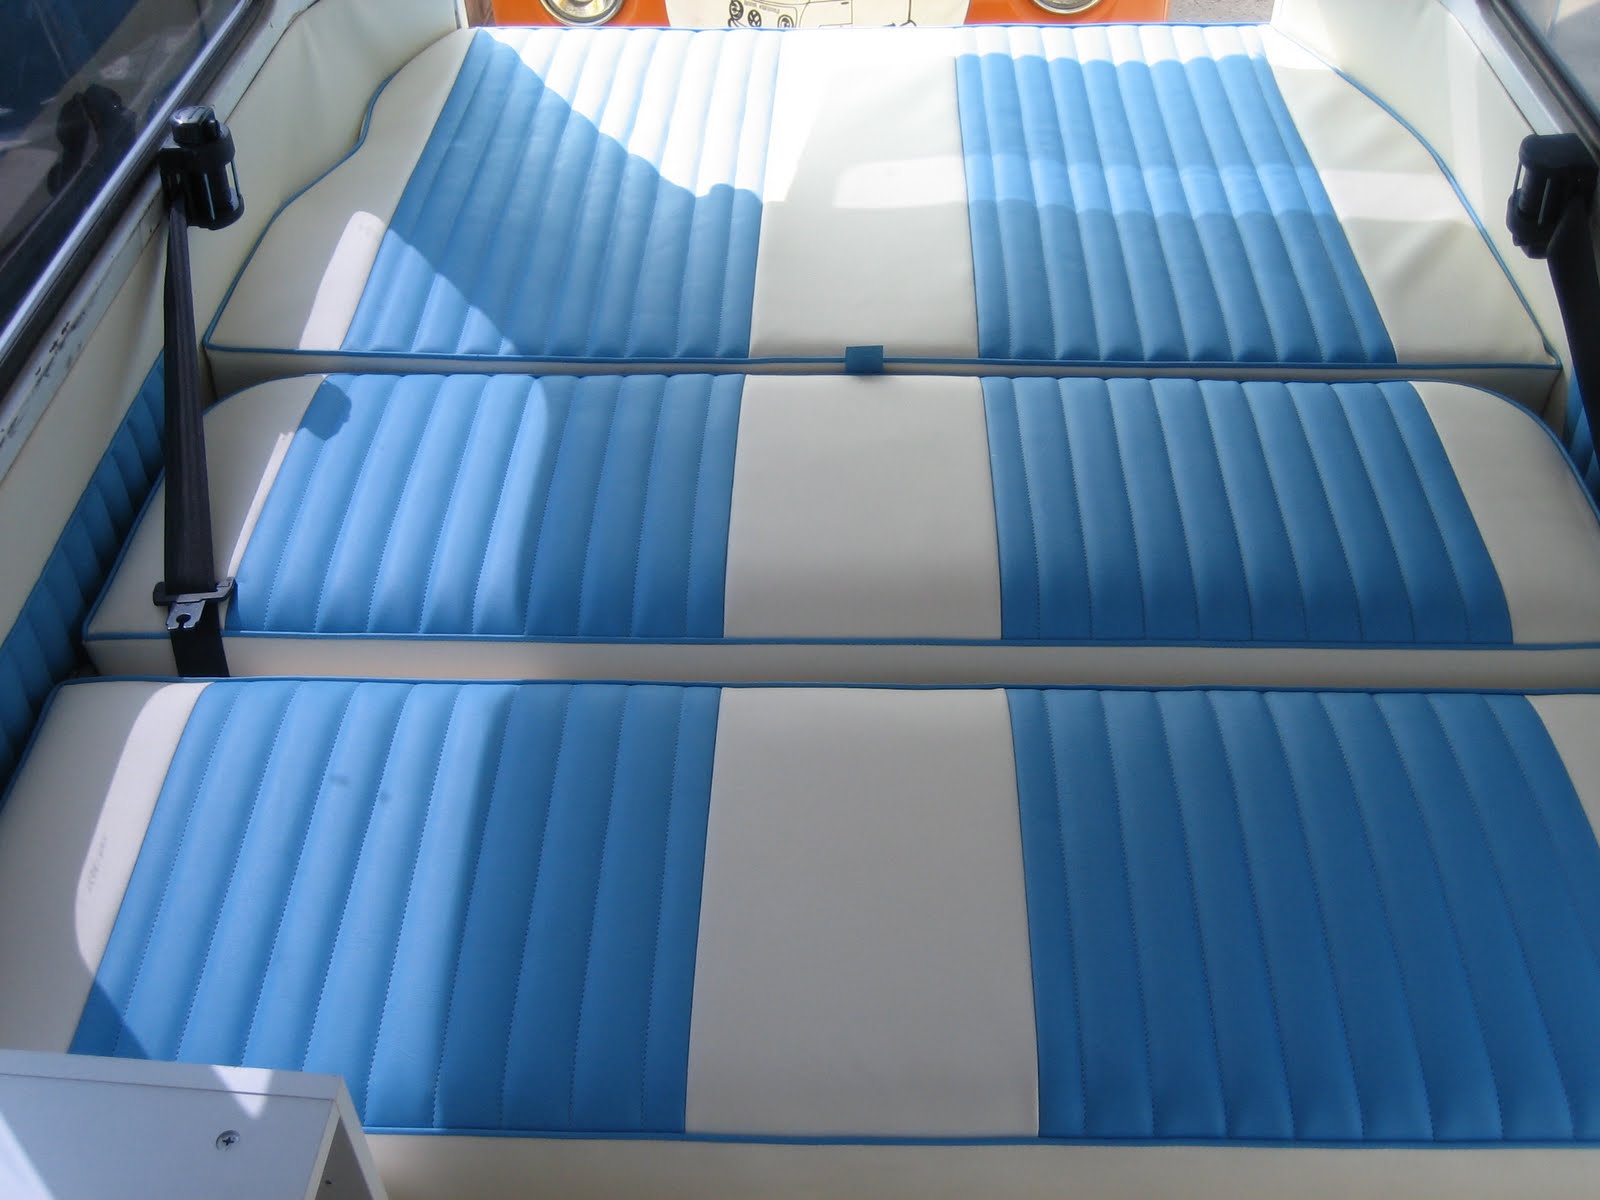
Bay Window Full Width Rock & Roll Bed

Hello to you all....I have uploaded these pictures of a full width rock & bed that i re covered in two tone leather cloth, I'm sorry that  I  cannot show any pictures of the make up as the computer ate them 
Still i hope you like these and if you have any questions please feel free to ask.
tel : 07794978914
email : incavilla@aol.com


This shows the bed laid out in all its glory.....I love the colour combination, it shows the bed of to its best.


From above as if on top of the wardrobe  !!!! this shows about lining up the upholstery is all important.


With the bed in seat mode again all lining up with a nice contrast piping to finish.


You can see a gap in between the seat and back to allow the seat belts to feed through and if you look close there is a tab in the centre , this allows you to pull the bed back into seating mode

.


Last but not least ....the 3rd cushion ,this is a beast of a cushion filling the whole engine bay area but no bed would be complete without it. I hope you liked the pics is you are passing call in and say hi .
thanks Colin

Type 25 Cab Head Lining


Hello to you all hope the summers been good to you all ?. bellow are some pictures showing the steps of fitting a front head lining to a type 25  hope you find them interesting.... i had a few swears at this one , but all come good  ENJOY.
you can contact me on : 
email :  incavilla@aol.com
tel : 07794978914


This shows the head lining all made up and with the support bars in place. note the contact glue along the front edge.... this was put on just before fitting as this can be a messy job in the cab area.


This show a view from the rear looking forward. Note the sound proffer foam put in place.... this helps reduce noise and insulates at the same time.


This shows the lining being tensioned all around. the secrete to this is not to over tighten the cloth when fitting and Patience, if you try to fit all in one go it will not work small adjustment are the best.


The rear lining finished in the grove on the van. tension is then pulled forward to the front corners then work from the middle out, this is getting there slowly.


Almost there, you can see the front now finished all the surplus lining was trimmed of then tucked under the front screen rubber.


All done....... ready for the sun visors to be fitted along with the rear view mirror time taken to fit this was about 3hrs but if you are fitting one yourself time is yours so slowly dose it as one wrong cut and ... start all over again. I hoped you liked this short blog keep looking as more to come.
thanks Colin,

Sunday, 8 August 2010

Split Screen Devon Camper

Well hello to you all, bellow are some pictures that Ive taken of a early Devon conversion split screen camper van .I am supplying and fitting new front and rear door cards to match the front bench seat colours. .Also i will be fitting head liner in ply covered in head lining PVC, I hope you all like........
you can contact me on : 
email : incavilla'aol.com
tel : 07794978914


This lovely  bus in all her glory at the VW jamboree  the owners Simon and Andy let us display the bus on our stand a big THANKS.


This is one of the old door cards ,note the speaker placement which will be needed to be kept in the same place.....


The rear of the van empty waiting for some insulating to go in, Also the window surrounds will be covered in the same PVC as the roof boards.


The front cab area ready for some insulation then the PVC ....wish me luck, they may be small bits but they very hard to get right.....


On to the front door cards and kick boards, you can see the board laid out with the material cut ready to be fixed in to place ,now the fun begins..


Marking out the areas for the material's, it a must to do this as you can see what it will look like when all done, this shows the centre with tuck and roll.


The stitching in progress....this shows the piping being sewn to the centre tuck and roll.


This shows all the parts to the door panel, vinyl top and bottom with tuck and roll cloth centres time for the sewing.....


All done....as if by magic.... well quite a few hours of hard work and loads of cups of tea......oops and a
 kit-Kat.


This shows the lower section of the door card having the foam glued and cut to shape, always take great care hear as this shows on the final look.


The wonders of staple guns.......makes my job so much easier, note the two rows of staples the first straight and close to the finish line and the second at an angle to hold down the salvage nice and neatly.


Almost there as you can see the speaker hole ready for  the hole to be cut in the upholstery, as you can see keeping it nice and neat pays of, no big lumps and bumps in the panel.


This shows the two rear side door panels all ready to be fitted much care is taken to get these panels to line up with each other.


There all done, with the speaker fitted and ready to fit to the van........


The front cab area having the head lining fitted, much care is needed as all be it a small area its one of the hardest to do and get a clean neat finish.


This shows the finished interior, note the seating cushions that i also done ,this was done in a matching tone fabric with contrast piping to match the front seat.


All done........with all its trimming in, matching curtains to finish the look. I hope you all enjoyed looking and reading this blog as much as i did working on this lovely van. keep looking for more updates soon.
Colin

Sunday, 1 August 2010

Motor Yacht Upholstery

Hello to you all, well hears something different to VWs and trimming of seats.
I have re covered cushions on a large motor yacht, I worked for a company some years ago now in Falmouth working on super yachts , This is a Little job i was asked to do. I thought it would be interesting to show you all. There are two areas to this job, all the upper deck area in the blue and white striped fabric and the lower deck cushions to the main cabin seating area.
you can contact me on : 
email : incavilla@aol.com
tel : 07794978914


This shows the upper deck area many hours of head scratching over getting the lines to match up but it was worth it.


The forward upper sun deck, more of the same cushions they look great .


The stowage  unit this was a simple cushion the make....lol


The main seating area bellow deck, trying to form the shape was the hardest thing to do, well worth the time spent.


This is ware it all happens, the helm seat.....many hours of cruising from this seat.


The pilots seat.....or wear you put your feet up and enjoy the ride.


A cabin end cushion, not the shape much like working on camper vans fitting cushions in small areas.


One more picture of the main seating area, hope you liked the pictures.


And the view of the yacht from the out side.......lets hope I've won the lottery.....and i have one please.


Friday, 23 July 2010

Mazda Seat Repair......

  1. Hello sorry not updated for so long. Had problems with camera...all fixed now, Bellow are some Mazda seats that i re trimmed the centre seat panels for a customer . I hope you like what you see
  2. you can contact me on :
  3. email : incavilla@aol.com 
  4. tel : 07794978914

As you can see above the drivers seat had most wear but surprisingly the side panels were in good condition, So removal of the centre for trimming was all that was needed.


With a few swear words.....the complete seat was removed ,they did not make it easy to get at the fixings.


A close up view of the worn area. The customer supplied the replacement cloth needed.


All here A few repairs were needed to the foam seat swab, once glued they were strengthened with calico patches.


This shows the removal of the fixing clips........oops sorry about the wrong sequence of pics, great care is needed at this stage as not to damage the foam and fixing rods.


This shows the new foam backed material being glued to a backing cloth to give it more strength allowing the fabric to be sewed.


There all cut and ready to sew, TIP : always make sure the brush ( nape of the material ) is cut in the  same direction as this is easy over looked.


The magic tools, the are called hog ring pliers  a must need tool for this job.


There all done and back round the foam swab ready to fit to the frame work.


There you go .......looking as good as new.......sorry about the water marks on the picture .


Both seats done and ready for the customer to pick up, I hope you liked what you see, keep looking as got loads more to put on hear soon.
Colin

Friday, 5 March 2010

SIMON BOLITHOS BAY WINDOW CAMPER RE-TRIM


Hello to you all, this is the first of Meany parts to Simon's bay window camper complete re-trim,
this is a bit different to the usual camper vans as this one has still got its original tin top roof.....and very nice it is to. You will see some pictures of the van as i do the complete through head lining.......looking forward to getting into this one.
Bellow is the first part : the front seats, as you can see they are not the original seats and they are very worn out......but hay scroll down and see what you think....enjoy.

 
As you can see the old seat is in need of help....but they are very comfy seats.so well worth the work.


First stage was to remove the seats from the van and then dismantle them into there component parts and inspect them.


The under side of both the drivers seat and the passengers seats had the same problem.....over the years the tension rods that fixed to the springs had worn or broken. So the firs step was to strip down and repair this area.


This is part of the process that I've show you before, I have striped down the covers and undone the stitching ,the panels are then used to cut the new cover with. All ways checking that the pattern is of a good fit so the new part will fit snug.


A mixed shot showing the parts needed to make the seat swab cover, the piping, the boarder, and the top panel. As you can see the centre part of this seat is being done in a strip tweed type fabric..........it looks fab.


This shot shows the out side back panel being put together ,note the two panels clipped together so when sewn the stay in place, This is a common problem when sewing an people ask me all the time on how this can be stopped. Well you can hand staple like i have, pin them with needle work pins or have check marks, you can see I've done this as well doubly making sure that all lines up.


Almost done.......this is the inside back panel with the piping sewn on with the bottom loop waiting for the fixing rod to be slid in.


A little jump forward....this is the shot of the under side of the seat again...... this time looking as new, I hope you like the finished item.


There it is in all her glory......I'm very pleased with the look of the two types of material, cant wait to see them in the van.


The back also complete just waiting to be put back together.


There all done. Note the strips lining up from the seat through to the back...i must as this was wrong the whole job would look naff.


Oops yep almost forgot..... the head rests.........as a trimmer these always cause Meany hours or filling the swear box and tons of cups of tea to get these right. well i have worked my magic and made these look better than new..... well i think so.


I have cut the material to a over size then filled the centre hole in with foam and a over lay of canvas, this gives a smother feel.

Ten a thin layer of foam.....all ready for the hard bit getting the material to shape .


All done.... as you can see the head rest was finished of with a contrast but matching piping trim.

All done ready to fit into the van a lot of hours to make this happen , but i hope you agree it was worth it.


There she is, looking like new and still a very comfy seats for many miles of driving.
I hope you liked what you have seen, as i said keep looking as the door panels and rear panels are the next items to be done.
contact me on : tel : 07794978914
email : incavilla@aol.com
See you all soon Colin.